The Dykem Test
The Best Way Yet To Check For Contact And Pits
John D. UptonOctober 15, 1998
The establishment of intimate contact between an optical component and its tool during processing along with the complete removal of pits are two of the most important foundations in all optical fabrication. Over the years, a number of techniques have been devised to help in these areas. Here is a new technique that performs both functions very well and can help lead to excellent surface quality in your optical projects.
There are often happy marriages between the various disciplines of ATMing. I happened upon one such cross-hobby idea that has proven to be very successful. Before presenting the idea, here is some background on its origins.
Some History
ATMs have long known of the "pencil test" described in the oldest of the ATM books available. The pencil test is used to determine when you have good contact between the optical component and the tool during grinding. In this test, you simply draw a cross-hatch or radial grid pattern onto the surface of the optic using a pencil. You then either start a normal wet, or if you're quite brave, you very carefully mate the optic and its tool and very lightly stroke them together for a few strokes without grit or water. While using either method, the pencil marks will begin to disappear and by watching the rate and points of smudging and disappearance across the mirror, you can easily deduce where the optic and tool are in close contact and where they are not.
In recent years, a variation of the pencil test using a Sharpie® permanent marker has been widely used. The test is performed by drawing the grid onto the optic's face with a Sharpie marker and proceeding to do one or more normal grinding wets. The Sharpie test works somewhat better than the original pencil test because the marker is waterproof, more vivid and therefore easier to see, and lasts longer into the wet than pencil marks. The Sharpie test can also be used for marking pits on the surface of the optical component that need to ground out. While doing a normal inspection of the optic and noting pits, you just mark the pit with the point of the Sharpie pen. The ink will stay in the bottom of the pit for a few wets or until it is ground out.
I had been thinking about an idea for some time for improving on the Sharpie Test. At the same time, I was looking for a way to solve the larger problem of reliably detecting pits during fine grinding. When I finally got around to trying my idea, I was happy to discover that it works better than I had ever hoped.
Enter Dykem
The idea is to use "Dykem®" machinist's layout fluid in place of the Sharpie marker on the surface of the optical component. Dykem is a very thin paint or dye that machinists brush onto metal parts to allow them to draw on the metal with any sharp scribing tool. They scribe the layout of cutting and drilling locations (& etc.) directly onto a metal part before machining. When applied to a surface, the Dykem looks (and smells) a lot like the ink in a Sharpie pen. Being very thin, it easily flows to fill all the pits and scratches on the surface to which it is applied. It is also quite water resistant. You could think of it as "Sharpie ink in bulk."
Dykem is the best known of several brands of machinist's layout fluid. I purchased mine locally from a machine tool supply house. You might try looking in the phone directory under "Machine Tools", "Machine Shop Supplies", or "Machine Shops" for a supplier near you. If there are no suppliers nearby, you may also try asking at a local machine shop. While a local machine shop may not normally want to sell retail supplies, they may agree to sell you small quantities. At least they can tell you where they get their own supplies. The other alternative is to mail order Dykem. Major industrial suppliers like MSC and McMaster-Carr stock the item.
The Dykem is relatively inexpensive - I paid just over $4.00 for a 4 oz bottle. Locally, it is about $30 per gallon. That would last a very long time, but I would recommend purchasing in smaller quantities since it is so volatile, it probably would not last long after being opened. One gallon will completely cover hundreds of optical fabrication projects. Dykem is available in brush-on form in cans (which I used) and in aerosol spray cans at a slightly higher price. It comes in dark steel blue and dark red colors. I'm using with the blue, but also purchased some red Dykem to experiment with later.
Using Dykem To Test For Pits
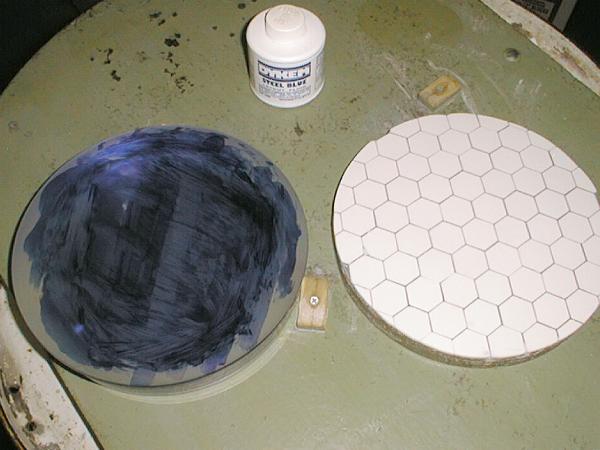
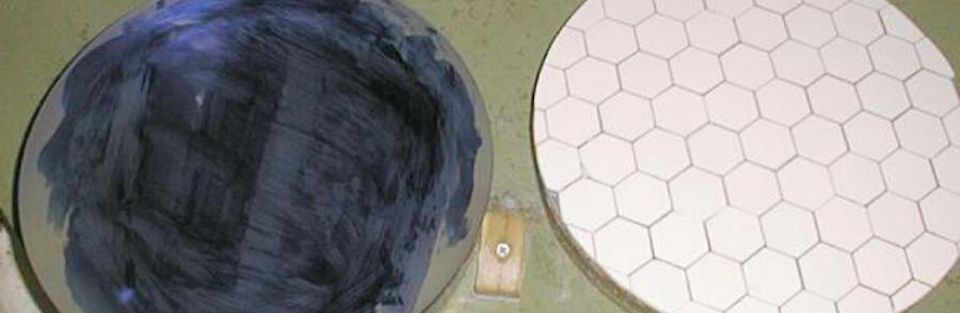
In use, I simply paint the whole surface of the optic with Dykem, let it dry thoroughly, and then grind for a couple of wets. During the first wet, you can easily observe the wear patterns of the tool on the optic just as you would when watching a Sharpie grid marked on the component. The Dykem easily shows exactly how good contact is during the wet.
The nice added benefit of using the Dykem, is that even after as many as six wets, some dye remained in the bottom of the deeper large pits that might have previously escaped detection and still needed to be ground out. It is very easy to put the washed optic on my light table (in which I had installed regular fluorescent bulbs) and look for the dark dye marks remaining on the surface. In fact, it worked even better to dampen the surface of the mirror so that the ground surface seemed to disappear and then just look for the dark blue specks which the marked the bottom of the still-dyed deeper pits. These pits readily stood out as small polka-dots all over the otherwise translucent surface.
I discovered one subtle point in using this test when a friend tried it out. He was not having much luck in reliably seeing the dyed pits. At first we thought the dye was not sticking to the bottom of his pits for some reason. This turned out not to be the case. We finally traced this to the light source he was using. The ability to easily detect small dyed pits is greatly enhanced by the use of a well diffused light source. Since I used my light table for the back-lighting, I had no trouble. My friend was able to diffuse his lighting and almost magically was then able to see the tiniest of pits.
After going through several iterations of this, I am convinced that this is a fairly foolproof way of checking for pits before going on to the next abrasive grade. Simply paint the optical component with the Dykem, grind two quick wets and then check that all traces of the Dykem are gone. The technique is also very useful to see just how many wets it takes to completely regrind the surface using any given abrasive size. While I painted the whole surface of the 8" mirror I was experimenting on, you can use as much or as little as you desire for a larger component. Painting a grid as in the Sharpie test will work just as well for establishing contact. The method really shines, though, in searching out remaining pits before changing grit sizes.
This technique works best early in fine grinding at #120 and #220 grit sizes. The usefulness of the technique begins to rapidly decline with smaller abrasive sizes and I don't think I will ever use it past #400 grit. By the time that abrasive size is reached, the pits are small and uniform enough to pose a lesser problem.
I'd be pleased to hear from others who try this. It seems to work so well for me, I am adding it to my normal operating procedures for all future optics projects.