Testing For Quality Of Polish
How To Tell When Your Mirror Is Completely Polished
John D. UptonApril 15, 2003
A question often asked by first time telescope mirror makers is "How can I tell when my mirror is completely polished?" The three most common methods of testing for quality of polish by amateurs are microscopic inspection, the sun test, and the laser test. This article explains how to perform these simple and useful tests.
Many first time mirror makers find themselves unsure as to when they should stop polishing. This is often understandable since they are anxious to begin the final stage of making their mirror -- figuring. Beginners are often cautioned not to perform a Foucault test on their mirror too soon lest they find a good figure. Such a happy event can greatly tempt one to call the mirror complete before a full optical polish is attained. Some will inevitably stop too soon leaving only a superficial polish on their mirror. This is often not discovered until the mirror is returned from the coater with a fresh layer of aluminum on the surface. The aluminized mirror's surface will appear bright and frosty rather than deeply metallic. Such an incompletely polished mirror will not perform to its full potential.
Testing for a complete polish on your mirror is actually quite easy. After your mirror appears polished to the unaided eye, you may apply one or more of the tests described below. Repeat the tests after each half hour of polishing until you are satisfied that your mirror is completely and thoroughly polished. Then, and only then, should you proceed to figuring your mirror.
Microscopic Inspection
The first method of checking for quality of polish is by direct inspection. A microscope or strong magnifier is used to directly inspect the surface of the mirror. You should focus on the surface of the mirror and carefully examine it for any signs of remaining pits or scratches. If you have any problems discerning when you are focusing on the surface, place a single hair or thin thread onto the mirror to help guide you in finding the proper focus point.
Use a fairly high power magnifier. A short focal length eyepiece of less than about 10 mm may be used. You should use the eyepiece "backwards" looking though the end that is normally inserted into a telescope's focuser. A simple, cheap eyepiece type is required. Many wide field and long eye relief eyepieces incorporate a built-in Barlow lens and may not be usable as a magnifier in this manner. A small 10x jewelers loupe is also very useful for the job. These may sometimes be found in hobby stores that stock supplies for coin and stamp collectors. Even better is to use a small hand held microscope such as those sold by Edmund Scientific or Radio Shack in the United States. These are available in magnifications of 25x to 100x.
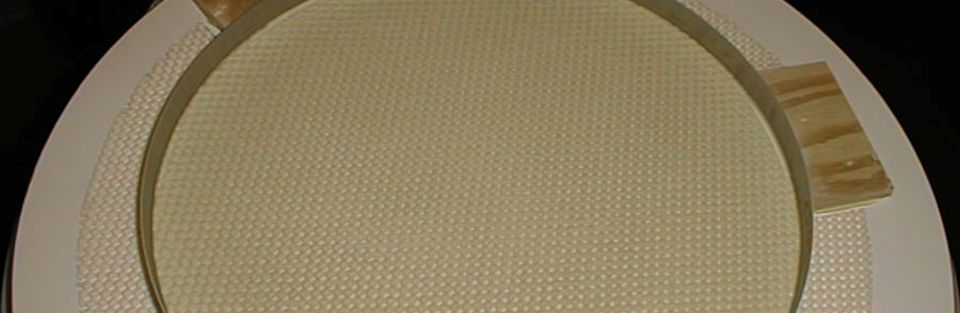
To apply the test, you place the mirror horizontally on a table or other work surface. If the rear surface of you mirror is polished (clear), also place a piece of light colored paper or poster board under the glass to aid in the illumination of any pits that may be present. While the light color helps diffuse the illumination, many ATMs prefer to use a dark or black background to increase contrast. Try both to see which you prefer. Illuminate the mirror's surface with a fairly bright light. The light should be placed to one side of the mirror so that your eyes are not distracted by any direct glare. If you have a diffused light source available like a light table, placing the mirror over the diffused source can often make small pits much easier to see. They will show up as very bright pinpoints of light against the diffused background.
With the mirror's surface illuminated with the bright light from the side or below, carefully inspect the mirror for signs of "frosting" or bright pinpoints of light. If you can see a lightly frosted surface with the magnifier, the mirror needs considerably more polishing. If you see any bright "star-like" sources of light on the surface, inspect them closely. They may be caused by a small particle of dust or lint resting on the mirror. Lightly touch the area with the corner of a clean lint-free cloth to see if they move. If they do not move, try changing the angle of the lighting slightly. You will soon be able to differentiate between pits and other imperfections or debris on the mirror.
Sun Test
The second test for quality of polish is the sun test. In this test, a magnifier lens or so-called "burning glass" is used to focus an image of the sun onto the surface of the mirror. This is a very old test. It is one of the most stringent of tests for quality of optical polish. The sun test was described in the original Amateur Telescope Making book series edited by Albert Ingals. The test is attributed to Clayton R. Tinsley, president of the Tinsley Laboratories and dates from 1934.
To perform the sun test, take your polished mirror outside on a sunny day. Point the surface of the mirror in the approximate direction of the sun. Be careful of where the sun's image from your mirror falls. Even an uncoated large mirror can concentrate considerable heat and light. Using a simple lens of 2 to 4 inches diameter as a magnifier, try to focus an image of the sun onto the surface of your mirror. You can practice on a piece of paper or wood to find the focal length of the lens. Don't leave the paper or wood under the focused image too long as it may burst into flames.
As you focus the image of the sun onto the glass surface, you will see the surface of the mirror "light up" if there are any pits, scratches, polishing compound, dust, dirt, or fingerprints on the mirror. On a very clean mirror with an excellent degree of polish, you may have trouble even seeing where the image's ray bundle has entered the glass. This test is amazingly effective. Lest you be too discouraged by the amount of light which appears to radiate from the image point, try this same test on a good quality commercial lens. Try a clean eyepiece or camera lens for comparison. Don't leave the sun's image on a commercial compound lens for too long. The heat may damage internal plastic parts or cemented elements. When your mirror's surface appears as good as the commercial surface, you may consider polishing to be complete.
Laser Test
The last method for testing quality of polish is the laser test. This is a modern derivative or alternative to the sun test. A laser beam is directed at the mirror and the point of entrance at the glass surface is examined for scattered light. The laser test conducted in a nearly dark room can be as effective and unforgiving as the sun test.
Almost any laser product will work for doing this test. I use a cheap red laser pointer because it is easy to hold and provides plenty of light. The key to using the laser test is understanding what you are looking for. Polished glass surfaces normally reflect about 4% of incident light at the surface. Most of the remainder enters the glass medium. We are concerned with neither of these beams. What you are looking for is the light that is scattered away from the plane defined by the laser beam and the normal to the entry point on the glass surface.
The simplest way to describe the test is to imagine sitting at a desk with the mirror face up before you. Further imagine holding the laser pointer over your shoulder and pointing the beam at the surface of the mirror. The beam intersects the surface at roughly a 30° to 45° angle. In this setup, about 4% of the initial beam is reflected from the surface away from you while most of the rest enters the glass and reflects off the back of the mirror or is scattered by a ground surface on the back. Don't worry about where either of these portions of the beam go or what they look like (so long as one of the beams isn't pointing at someone else across from you). Instead, you look at the surface of the mirror and try to detect the beam's point of entry on the surface. This point will show up due to back-scatter of the beam if the surface has incomplete polish, pits, dirt, or fingerprints on it. Once you understand what you are looking for, you can use the laser at a position other than that described above. I most often prefer to shine the laser onto the glass from one side so that I am looking at the entry point from a direction nearly normal to the plane the beam and its reflection.
Like the sun test, this is a very sensitive method for testing degree of polish. Try it on a commercial lens and compare that to your mirror. This test can be done in normal room lighting but is most sensitive in subdued light or even in the dark. Only a well polished and very clean surface will completely pass this test. The laser test in a darkened room will show pits as very bright pinpoints of light on the mirror's surface. You can search for pits by slowly sweeping the laser across the entire surface of the mirror watching for these bright points to appear. Before concluding that you have found a pit, gently try to move the pinpoint with the corner of a lint-free cloth to make sure it isn't a tiny speck of dust. It is amazing what you can find on a "clean" surface using this test method.
Any of the tests described above will tell you when your mirror is polished and ready for figuring. Use the test that is most meaningful for your situation. I often use all of the tests just to see where I am when polishing, though I do tend to use the laser test in a darkened room most of the time as my final test. It is easy to do and rivals the sun test in thoroughly detecting degree of polish. Use one or all but do check for degree of polish before you commit your mirror to the aluminizer. As always, knowing when your mirror is complete is better than guessing.